¶ What's BMCU
The content on this page is actually a bit old, waiting for an update - 03/07/2025
Please note that BMCU is an unofficial third-party DIY component. Its stability and reliability cannot match those of the original official products. BMCU is still undergoing continuous iterations, which means that even if you purchase a BMCU, you may encounter issues in the near future that require self-repair. Additionally, new versions of firmware or enclosures may be released, and you may need to upgrade them on your own. We also cannot guarantee whether Bambu Lab will implement measures in the future that may block or restrict the use of BMCU.
The original author's project page:
https://oshwhub.com/bamboo-shoot-xmcu-pcb-team/bmcu
https://gitee.com/at_4061N/BMCU
This section is a repost of the original content by the author, and I have translated it into English. The red-marked parts are my own annotations.
This page, including all BMCU-related content, follows the original author's open-source license and is freely available to everyone.
With due credit to the original author 4061N.
向原作者4061N大佬及其团队致敬。
¶ Introduction
The BMCU is designed based on open source materials, according to the protocol introduction of bambubus on Github, and the reference data provided by users, so we designed a system to simulate the operation of AMS for A series printers.
Since firmware version 2-16, the BMCU can recognize the connected printer as either a P/X series or an A series.
- When connected to P/X series -> Emulate AMS system
- When connected to A series -> Emulate AMS Lite system
For specific information about how to use BMCU on the P/X series, please refer to this page : BMCU in P series
BMCU operates on a four-channel unit and is currently designed with the CH32 microcontroller as the main control unit.
The design is based on publicly available online resources and independent testing. The program is developed using Platform IO with Arduino support for CH32, utilizing the robtiltaart CRC library.
⚠️ Note: This project follows the GPL2.0 open-source license. However, any commercial use beyond personal learning is strictly prohibited.
BMCU is intended only for DIY learning and can be integrated with A1, A1mini printers for operation.
Its functions are similar to AMS lite, primarily enabling multi-material printing and automated feeding. However, it does not support RFID material recognition.
We always recommend that you choose the official Bambulab AMS Lite product when possible for a better experience.
¶ Features of BMCU
-
Unloading does not need to be backed up to the break detection like AMCU, but just exit the five passes, switching consumables faster
-
Side-by-side structure, does not include shelves, which means that you can put the consumables in a sealed box, which feeds your printer.
-
Has a buffer, before the printer triggered winding material can be actively feeding, to prevent excessive resistance to consumables lead to problems
-
Device standardisation, when we designed the machine, we defined many parts as a uniform parameter, which enabled the one-time DIY success rate to be increased, preventing the cost from increasing.
-
The BMCU explores a photoelectric detection design that allows the photoelectric switch to detect transparent consumables, eliminating the resistance of consumables and their instability caused by the micro-detection method. The photoelectric design will be used separately with other open source protocols that allow borrowing.
¶ DIY Cost
Note: The platforms mentioned by the author are open to China only.
JLC's international site
PCB support JLC free proofing standard, motherboard and component boards will consume two coupons combined, the cost of components on it in about RMB 80
Mechanical parts cost around RMB 130
Counting other hidden costs that may exist, the replica cost is estimated at RMB 220, not counting printing supplies
¶ Downloads
Check Download center in section BMCU Tutorials
BMCU_Tutorial
¶ Known issues
As a user of BMCUs, here are the issues I've noticed or mentioned by the authors.
Known issue:
- BMCU does not support NFC recognition of bambulab original supplies.
- Transparent filaments may not be detected.
- Some gear noise may occur. -> in my case, channel 4 makes more noise than others.
- Filament still shows up when not plugged in. Especially for channel 1.
- Occasionally stuck at 99% after completing a print - BMCU can't draw back material
- It is possible that Bambulab may block this component after a firmware update. The BMCU went through two bambulab firmware updates. However, given the current attitude of bambulab towards third-party slicing software, it is impossible to be completely optimistic about the future.
¶ FAQ
¶ 1. Is BMCU an official product from Bambulab?
No, BMCU is an open-source DIY project developed by a Chinese developer, 4061N.
¶ 2. Will Bambulab ban the use of BMCU?
There is no guarantee, and future compatibility depends on Bambulab's policies and updates.
Currently a user has accidentally triggered the Unauthorised AMS systeme error on the H2D + AMS2 PRO combination, even though he is using the official devices.
This means that Bambulab may be using an encryption programme on the newer device.
So in the worst case, it may be necessary to keep the BMCU available by not upgrading the printer's firmware
¶ 3. What 3D printers does BMCU support?
BMCU natively supports Bambulab A Series printers as reconized as AMS Lite.
Additionally, with extra DIY modifications, it can be adapted to work with the Bambulab P Series and potentially other brands with community-driven adaptations.
¶ 4. What is the difference between BMCU and the original AMS Lite?
in terms of functionality,the main difference is that BMCU does not support RFID recognition.
¶ 5. Should I get the 130/180 version or the 370 version?
| Feature | 130/180 Version | 370 Version |
|---|---|---|
| Feeding Mechanism | Passive feeding; remains quiet and stable as long as there is no resistance in filament feeding. | Active feeding; periodically pushes filament to the printer, which may generate some noise. However, many users report it is still quiet. |
| Noise Level | Generally quieter. Some noise during filament loading and unloading. | Potentially noisier due to active feeding, but user feedback indicates it is still relatively quiet. |
| Filament Loading/Unloading Speed | Slower loading and unloading. With some noise. | Very fast loading and unloading but produces noticeable noise. |
| Assembly Difficulty | Slightly more complex to assemble. | Easier to assemble. |
| Maintenance | Risk of clutch wear over time. | Risk of cleaning of the filament hole. If using metal gears, may generate more black grease residue. |
| Disadvantages & Issues | If not installed properly, it may cause the printer to get stuck at 99% after printing, continuously flushing material. | May push up the printer's five-way connector and could cause filament grinding, leading to clogging issues. |
Version 130 is structurally complex and requires more hands-on skills. However, as the model improves, the current 130 version is very stable.
Version 370 is not yet fully in the official version and is still in the process of iteration.
The prevailing view at the moment is that the 130 version is better, but the 370 version is the future. The next author's offcial version will be still 370 version's variant.
¶ 6. Should I get the metal gear version?
According to other developers, metal gears do not provide better performance.and may further lead to ‘chewing’ problems.
Metal gears may reduce the risk of gears wearing into each other.
(Metal gears are very expensive and difficult to install on motors)
At present, all-metal gears are not fully recommended. Metal gears will have unavoidable wear and tear during initial use, which may result in the production of black oily substances such as metal shavings and lubricating oil mixing, causing maintenance.
Metal worm gears are recommended but they are very difficult to fit, the motor shaft is 2mm and usually the worm has an internal diameter of 1.95mm - 2mm, you may need to heat the worm to complete the interference fit.
¶ Photo Gallery
¶ my BMCU in use
My A1 mini
.jpg)
My A1
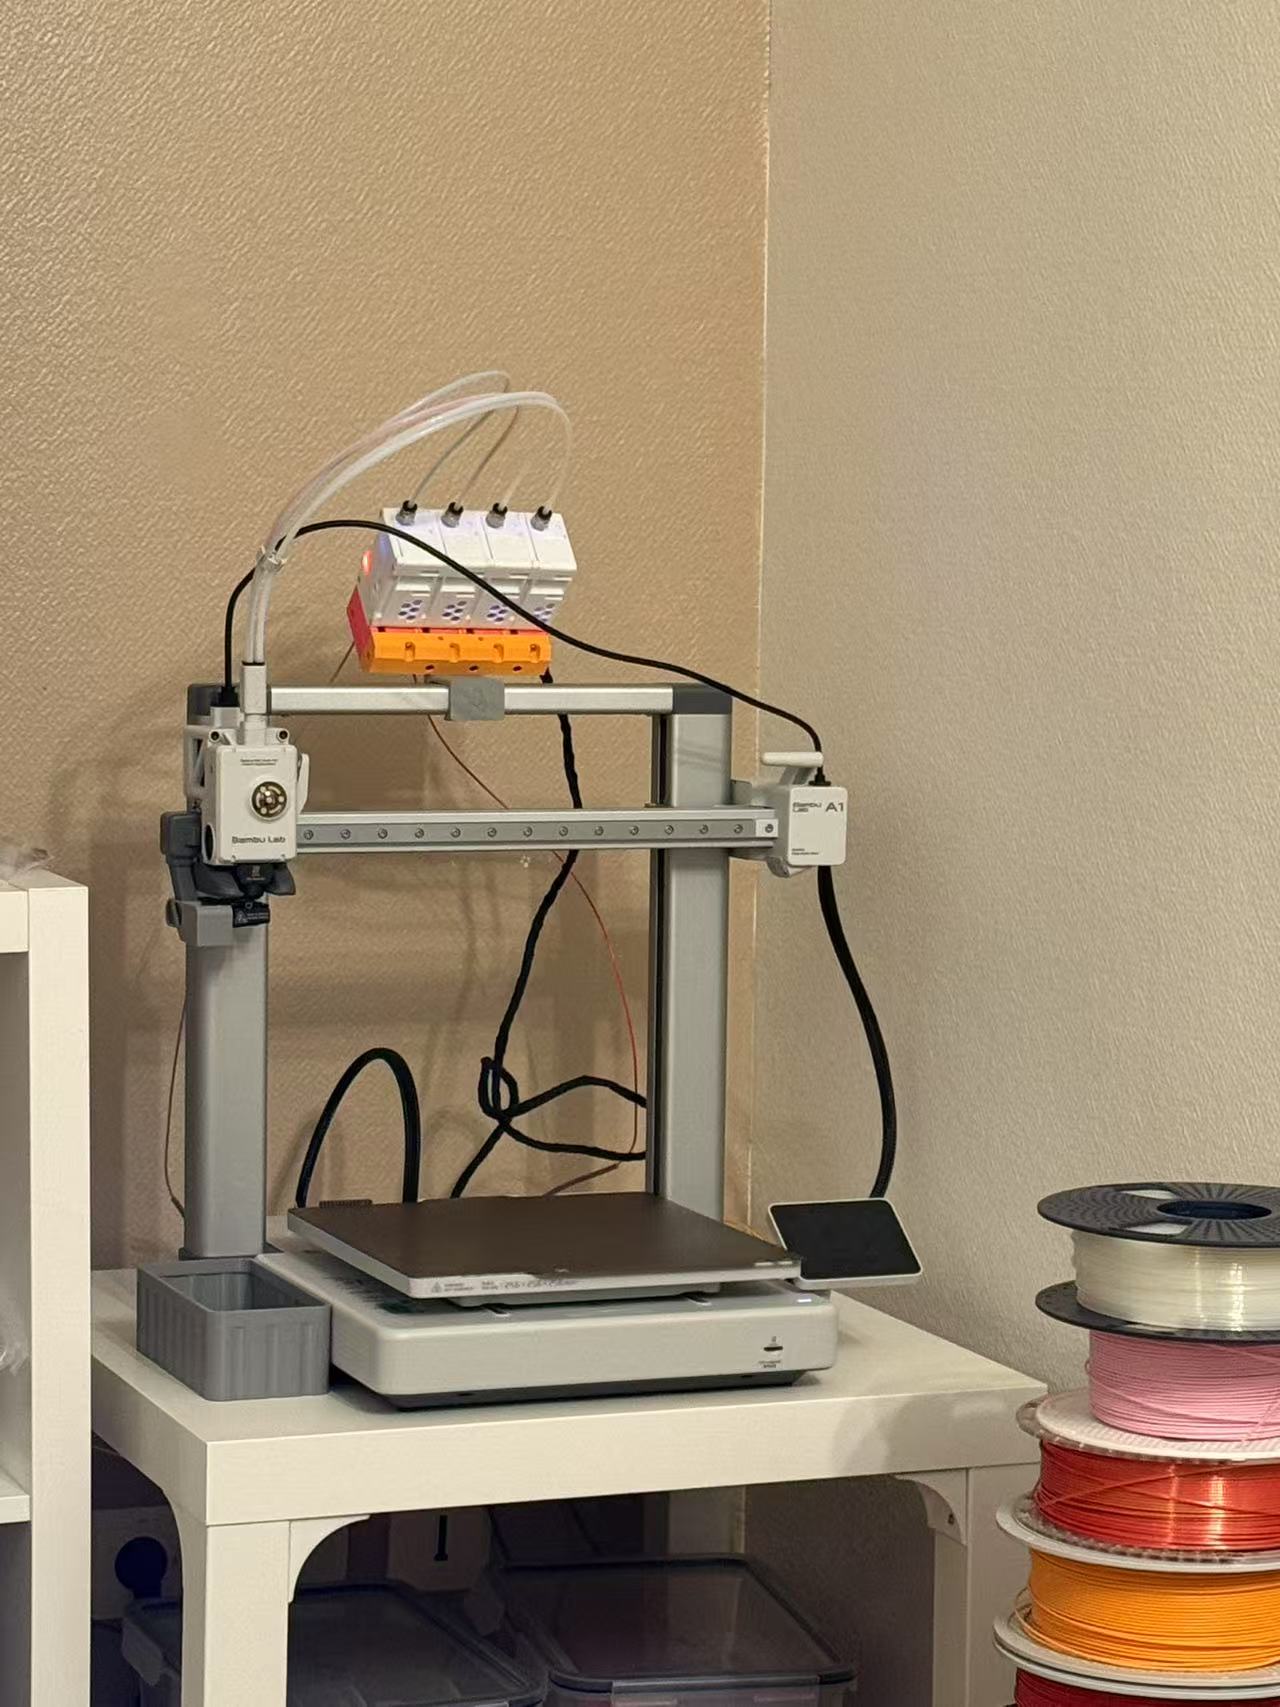
I posted video or picture of the support installed in wrong way in some places. (gray part in this photo)
When mounting the BMCU on the A1 you should have the support side with the BMCU logo facing you
¶ Video Gallery
BMCU with two color multi-color printing.
The support in this video is mounted the wrong way, do not mount it like in the video,
You should have the logo facing you !!