¶ BMCU Flashing Tutorial
Thanks to Lukas and David for providing some context and photos for this page.
If you did not solder the motherboard yourself, flashing is usually not required. Unless you want to upgrade the firmware.
¶ ⚠️ WARNING
🔥 Before flashing, ensure there are no soldering issues!!!! Check for power short circuits!!!! 🔥
🔥 Before flashing, ensure there are no soldering issues!!!! Check for power short circuits!!!! 🔥
🔥 Before flashing, ensure there are no soldering issues!!!! Check for power short circuits!!!! 🔥
¶ Required Tools
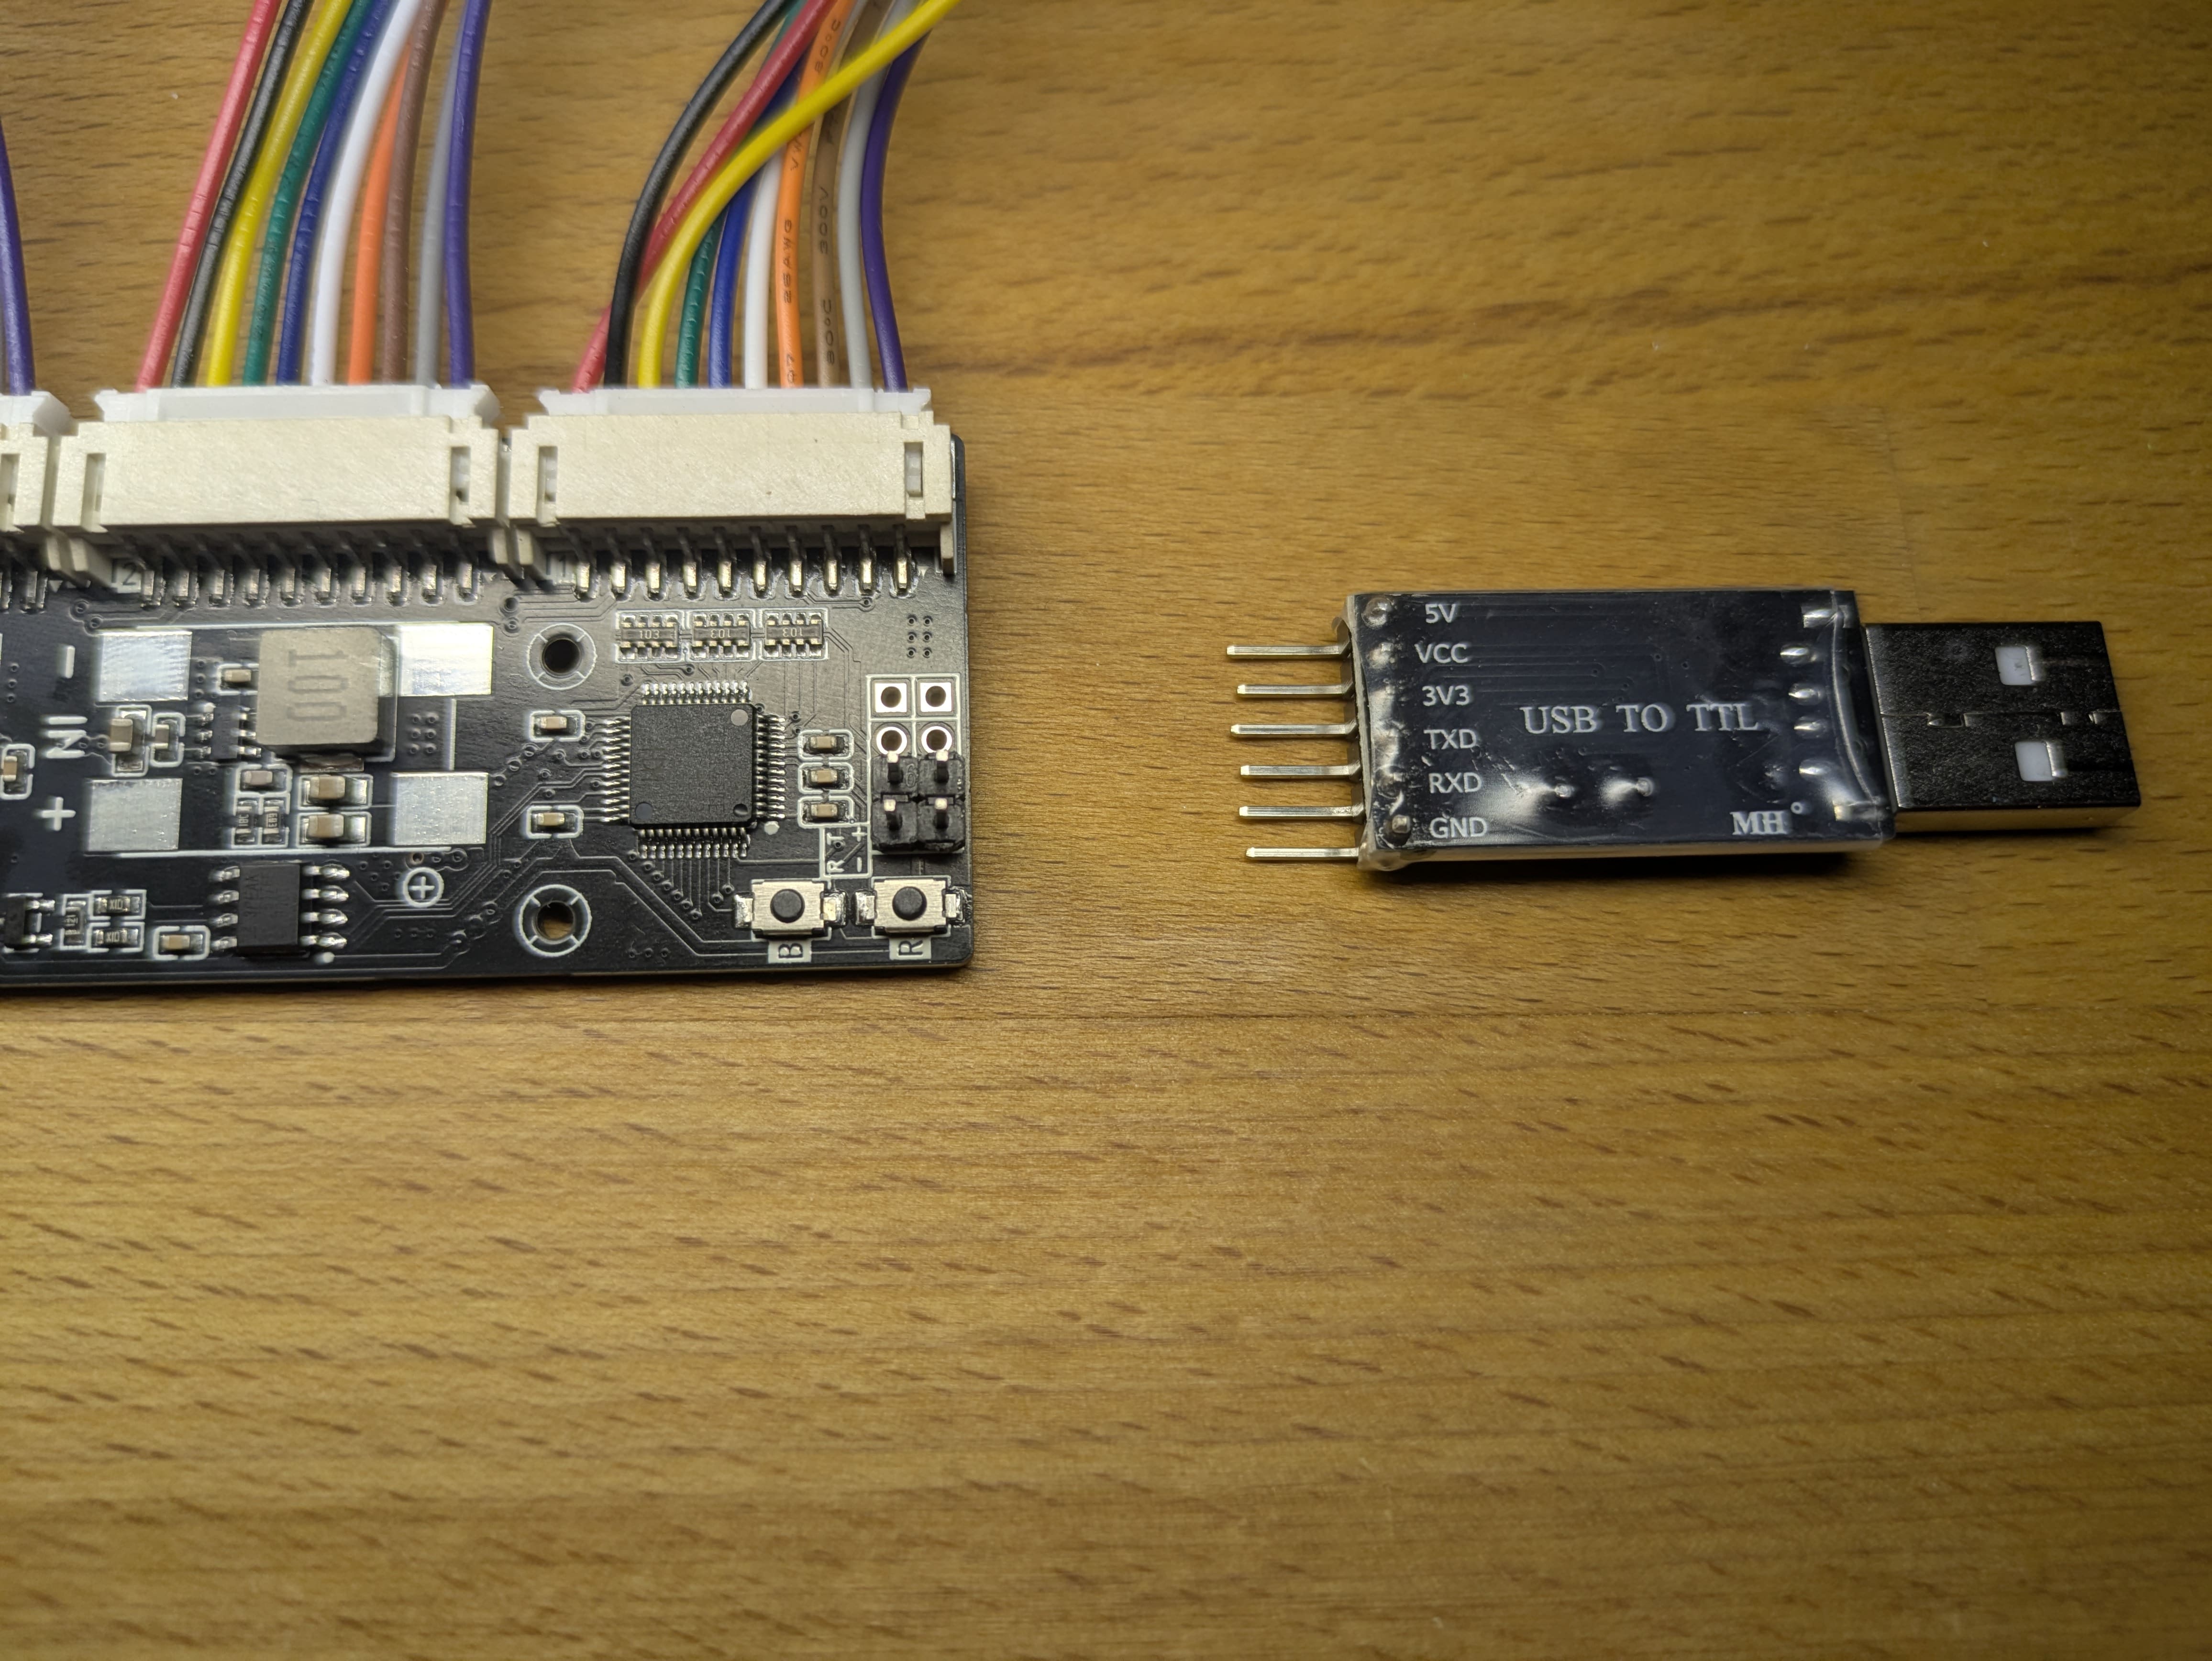
- Multiple Dupont Wires (To connect the flasher and the BMCU mainboard).
- USB to Serial Adapter
- Computer runs windows. -> If you're using a Mac/Linux, flashing is possible, but I don't have any tutorials or resources for mac.
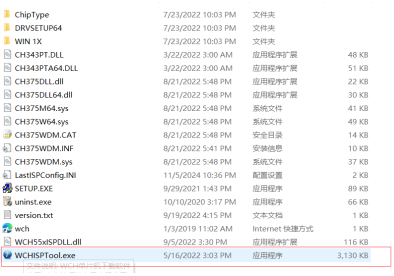
- Software: WCHISPTool
The classic version used in this tutoriel : wchisptool-v3.3.7z
A newer version : download at WCH website
¶ Flashing with UART (TTL) using CH340
¶ 1. Connect the BMCU Mainboard and USB Serial Tool
⚠️ DO NOT connect the BMCU to the printer during the entire process!
-
Open the software
-
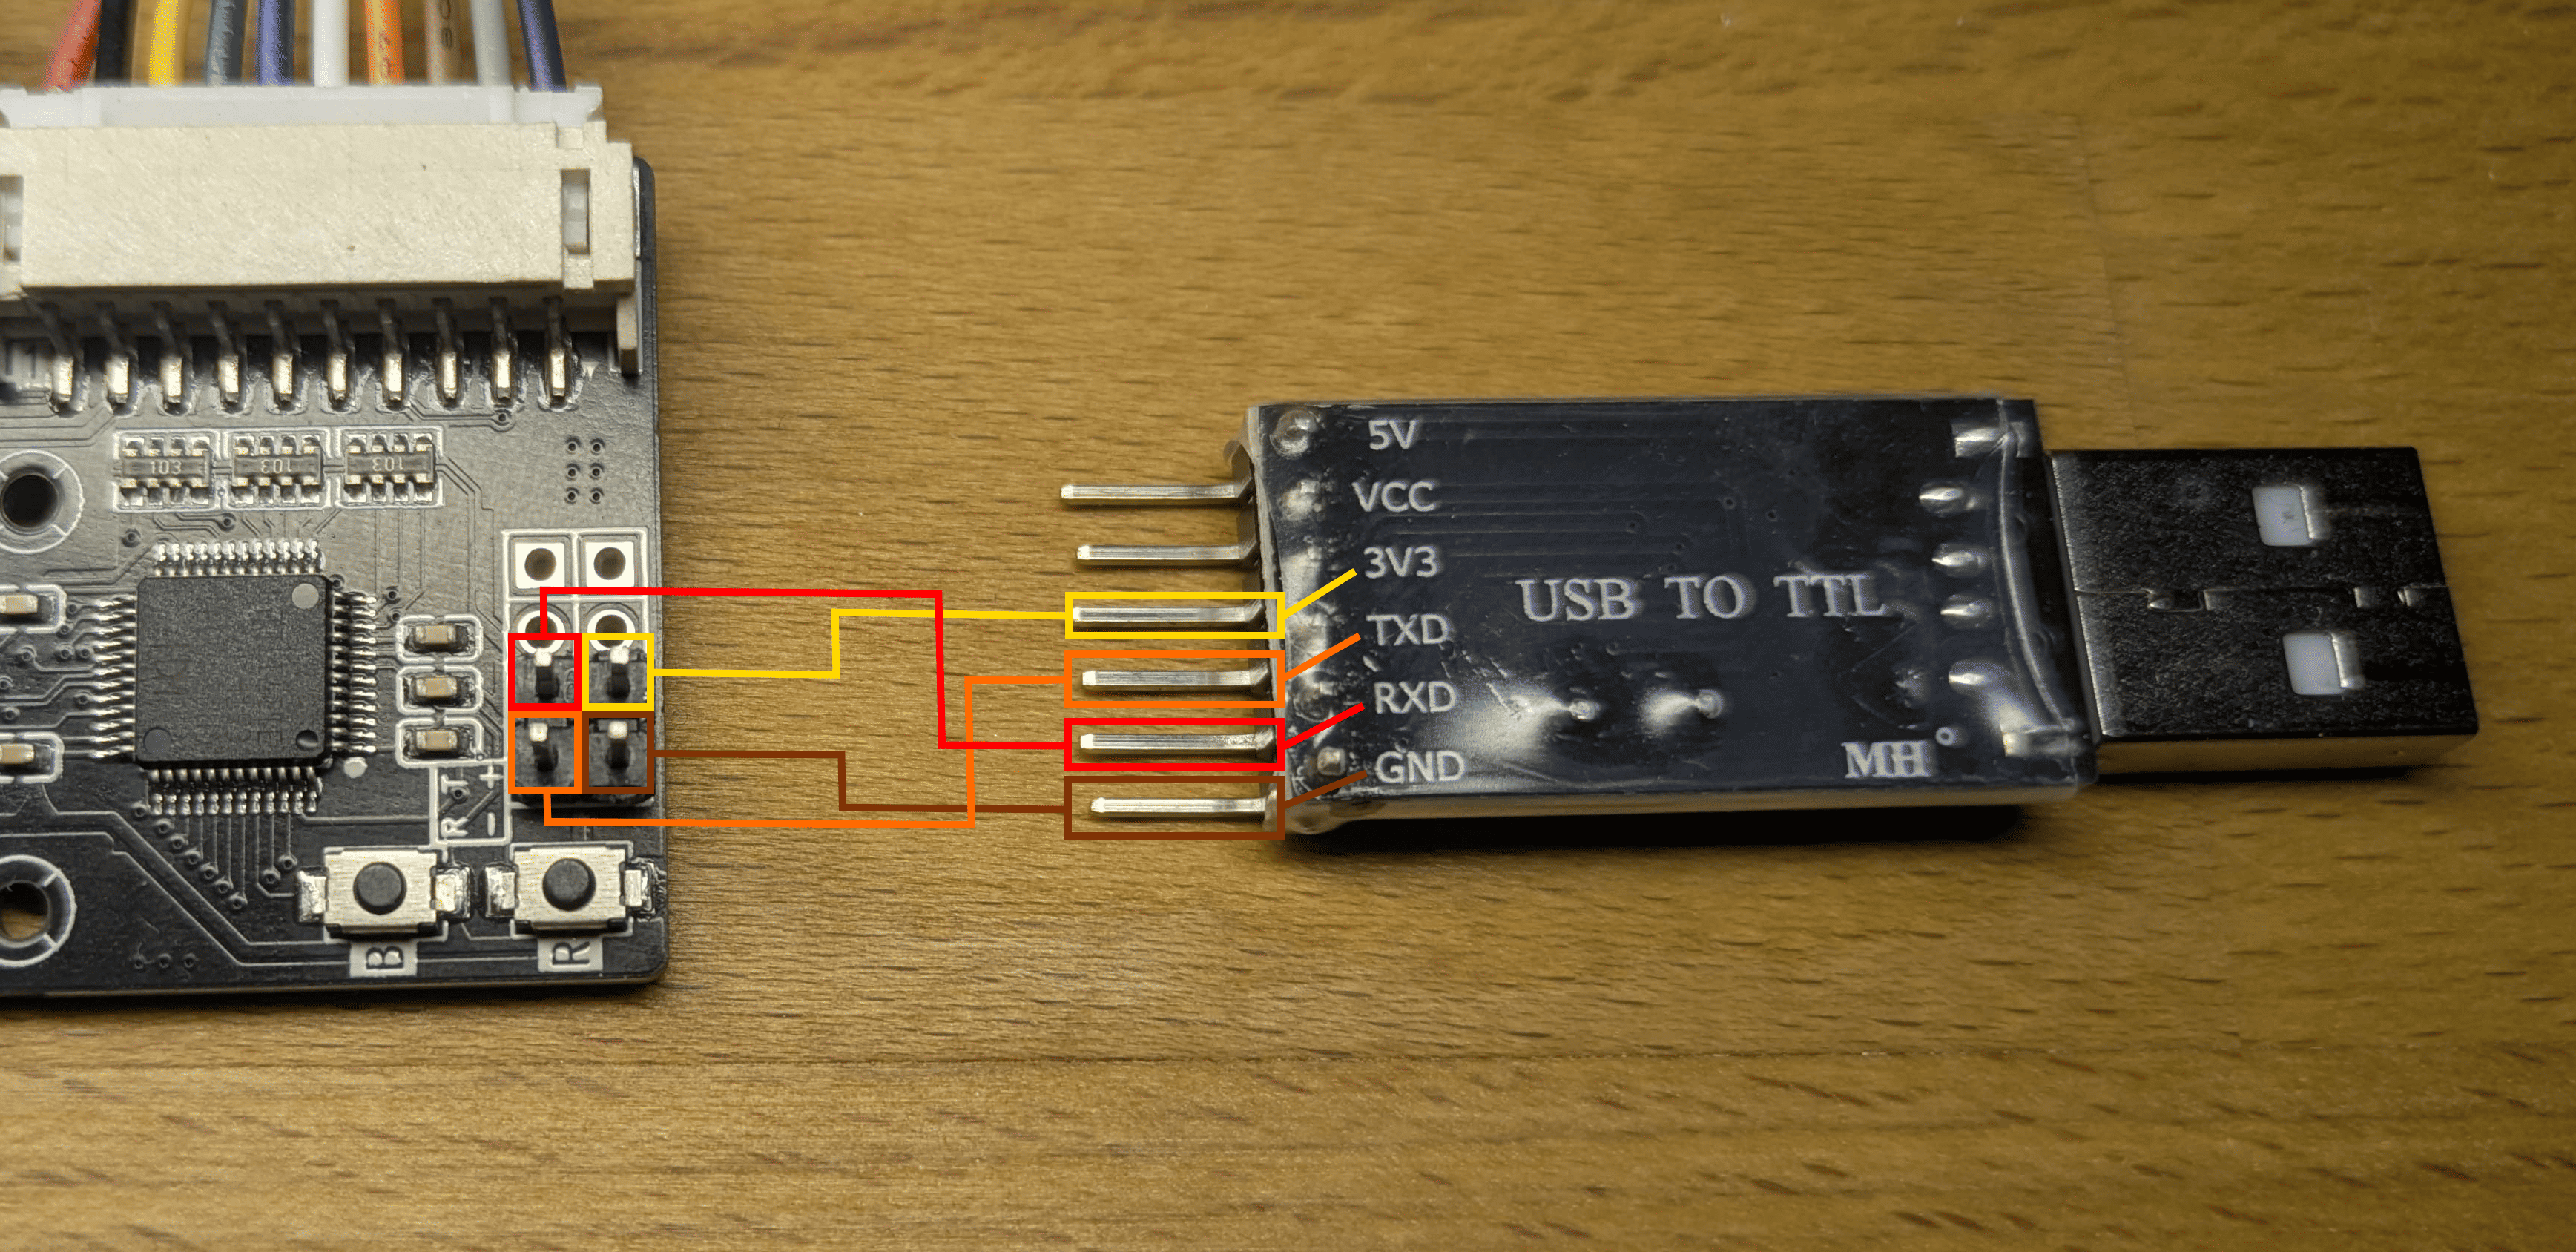
Connect wires according to the wiring instructions.
BMCU USB Serial Tool R TXD T RXD ➕ 3V3 ➖ GND
You may receive a yellow jumper cap, if it is similar to the converter on the right, no need to use it.
Connect 3.3V as VCC to the '+' pin on the BMCU mainboard.
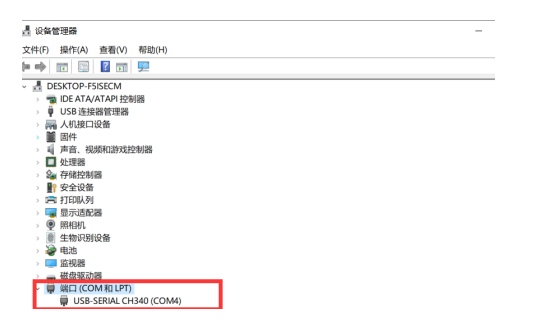
If you don't see a serial device here, please install the CH340 chip driver
https://www.arduined.eu/ch340-windows-10-driver-download/#google_vignette
¶ 2. Connect the USB Serial Tool to Your PC
- Your computer should recognize the serial port automatically.
- The COM port number might differ from the example in the image.
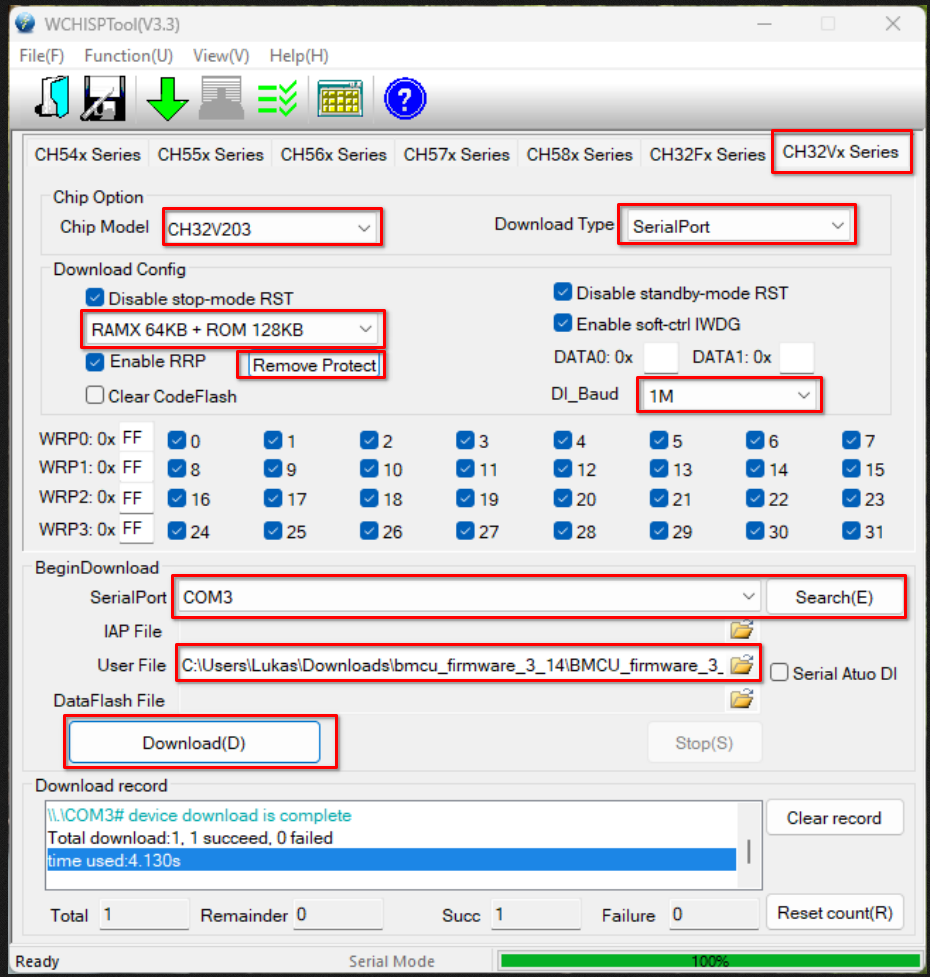
¶ 3. Configure WCHISPTool Settings
Open the WCHISPTool software and set the following options:
- Chip Model:
CH32V203 - Download Type:
SerialPort - DI – Baud Rate:
1M - SerialPort: Auto-detected (your COM port)
- User File: Choose the firmware
.binfile (available from our wiki)
¶ 4. Unlock the Chip Protection
This is a critical step before flashing the firmware.
¶ ✅ Recommended Method:
- Hold down the B button (do not release it throughout).
- While holding B, briefly press the R button once.
- While still holding B, click the "Remove Protect" button in the WCHISPTool software.
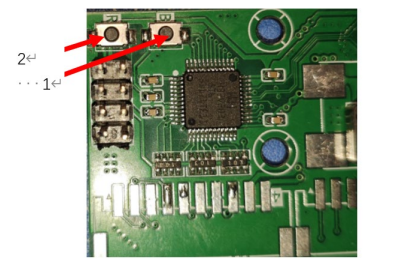
If successful, you’ll see a red “Unlocked” message in the tool.

⚠️ If it keeps failing:
If you build your own PCB, please always check first for any soldering issues, such as solder bridges on resistor arrays, solder bridges on the CH32V chip, or short circuits in the circuit.
- First, try again using the same button sequence carefully, hold always the B button.
- Second, double-click the “Download” button to force the chip into response mode, then try "Remove Protect" again.
- (Rare but indeed some chips will perform like this) try swapping the TX and RX wires (i.e., TX-to-TX and RX-to-RX instead of cross).
¶ 5. Flash the Firmware
Click the Download button.
- Be patient during the process.
- If flashing is successful, it should look like this:
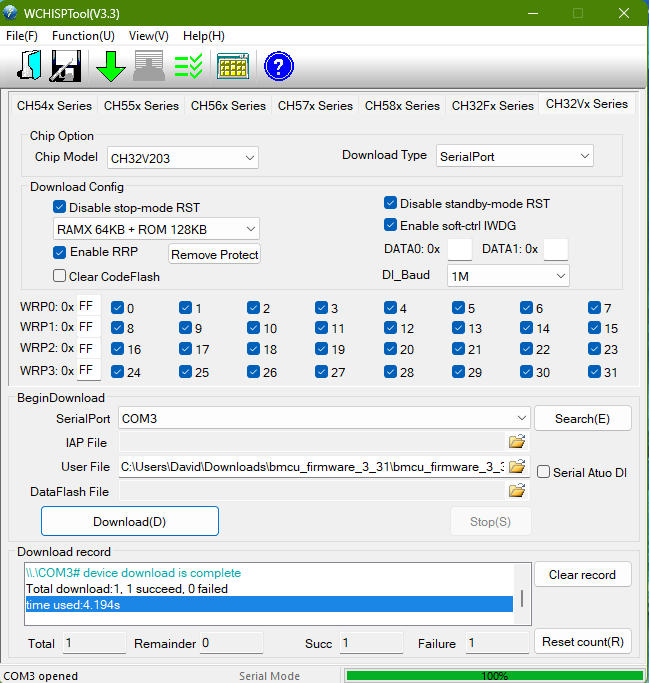
¶ ⚠️ If Flashing Fails:
- Try pressing and holding the B button while clicking “Download”.
- Alternatively, try changing the baud rate to 115200.
- In rare cases, try reversing TX and RX (TX-to-TX, RX-to-RX) if not already done.
¶ 6. Reboot the Board
- Press the R button once.
- The red LED on the mainboard should now light up.
- 🎉 Congratulations! Firmware flashing is complete! 🎉
¶ With Type-C interface
¶ Open the software
¶ Configure WCHISPTool Settings
Open the WCHISPTool software and set the following options:
- Chip Model:
CH32V203 - Download Type: Still
Serial Port - DI – Baud Rate:
1M - User File: Choose the firmware
.binfile (available from our wiki) - Tick the "Serial Auto DI" option.
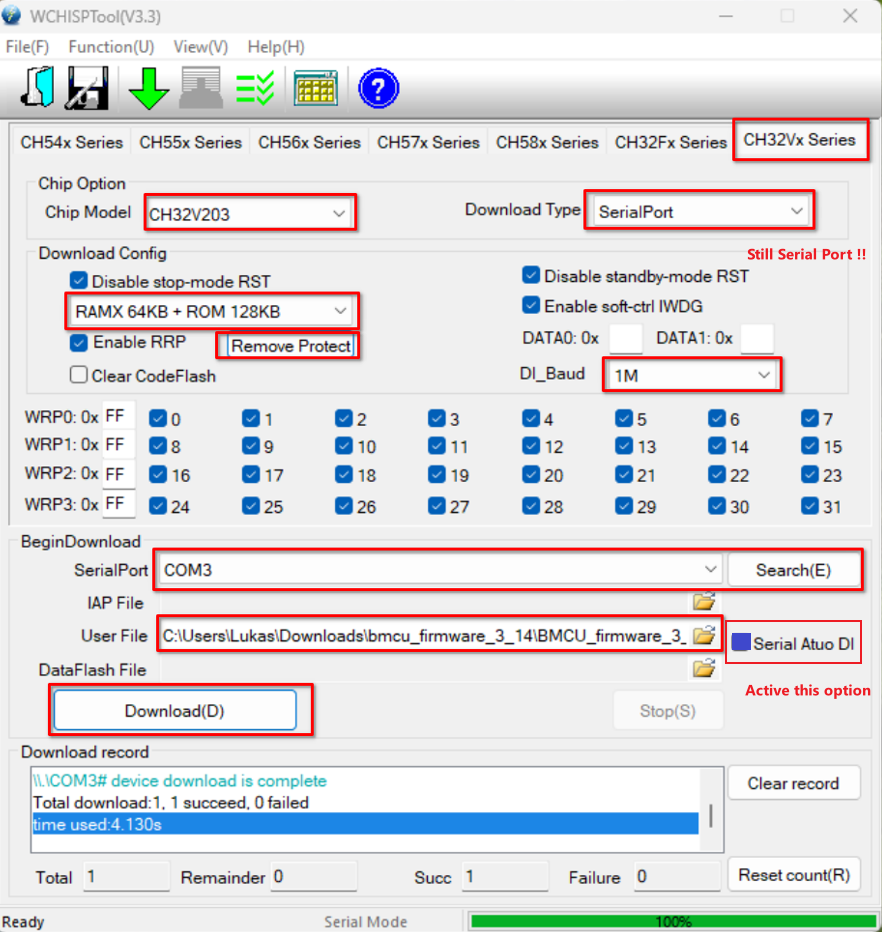
¶ Action sequence
Click : Remove Protect -> Download -> Remove Protect Again -> Download Again -> Repeat this loop until done(normolly the second download will be successful, if not check if you done something wrong)
You might see some error messages during the first loop.
¶ Using Mac / Linux
todo
¶ Testing
⚠️⚠️⚠️Avoid hot plugging and unplugging the motherboard and printer cables.⚠️⚠️⚠️
The right approach(just in case you are not sure what to do):
- Power off the printer
- Connect the BMCU to the printer
- Switch on the printer power
- You should see AMS appear in the consumables option, even if you have not inserted consumables, it may show that consumables are present in some channels (known bug)
- Power off the printer
- Disconnect the BMCU cable